Thinking of going on a snowhole expedition?
The best way to build a snowhole
Andy Bateman of Scot Mountain Holidays leads at least 3 commercial snow hole expeditions in the Cairngorms Mountains every winter season. He has introduced scores of people to the magic of the winter season. He is also an expert at the skill of building a snow hole for a drip free night out in the mountains. To see what snowholing expedition experience is like for the customer check out our video on YouTube:
Ambient Temperature
Seasonal temperatures on the high hills in Scotland are never as low as those in the valleys. You need to take this into consideration when planning to snowhole. Here in Boat of Garten we get temperatures of around -20oC. The lowest ever recorded temperature on the summit of Cairngorm is -16.5oC. Cold temperatures in the valley always occur under cold settled conditions. This is when the cold air drains off the mountain. The cold air then pools in the bottom of the valley. This means that in the Cairngorms the temperatures are never as low as in Norway.
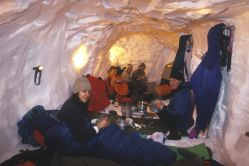
Enjoying an evening meal in the luxury palace makes the snowholing expedition unforgettable!
Avoiding roof sag/collapse
In Norway, you need to capture the warm air. Most people learn to build snow caves in Norway. They learn to create features which capture the warm air inside the shelter. In Scotland, however, you are operating much close to the melting temperature of snow so sloping entrances, sleeping platforms and cold air drains become much less important for the snow hole expedition.
Roof sag is a combination of the temperature rising too much, poor ventilation and not having a thick enough roof or having a large area of unsupported roof. A roof and front wall of approx. 1m thick is vital. If daylight can be seen through either the roof or the wall, they are probably too thin. However, bear in mind that a roof that thick will need an adequately thick & strong front wall.
An Apex ceiling
Avoid large areas of unsupported roof by keeping your snow hole more like a tunnel, narrow. Aim for a distance of no more than 2 body widths, side by side lengthwise. This means you can create a steep-angled apex ceiling which helps to avoid any drip points and allows you to channel warm air towards ventilation holes.
Avoid avalanches
Many snowhole sites by virtue of their high snow accumulation and steep slopes are prone to avalanches. To be safe, you may need to pick a slope with a more gentle gradient and spend more time digging into the slope. To maintain a 1m thick roof on a 30 degree slope you will have to dig horizontally 2m from the top of the doorway before widening out.
Ventilation
Make sure there is good ventilation and regularly watch your breath then you will avoid carbon monoxide poisoning. If you see it drifting off to one side, it’s a good indication that ventilation is adequate. Never cook in a snowhole without regularly checking there is adequate ventilation.
It’s a good idea to create ventilation holes in your snow hole because of the Scottish climatic conditions.
Make your snow hole large enough to stand up in so you don’t get back ache from crouching.
Make them big
One potential hazard of digging a small snow hole is that you don’t have enough space to put the snow when you attempt to extricate yourself in the morning. One of the snowholes Andy built in the Cairngorms involved digging out through 1.5m of fresh, drifted snow to get out in the morning.
Snowholing expedition Tools
Never underestimate how hard the Scottish snow pack could be. At least make sure your snow shovel has a metal scoop and that you are also carrying a snow saw.
Conclusion
Time taken to construct your snow hole is vital. A communal snow hole can take 4 – 5 hours to dig to make sure that you have the best construction possible.
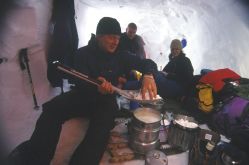
See more about our snow hole expedition!


