
This website uses cookies to improve your experience. We\'ll assume you\'re ok with this, but you can opt-out if you wish. Read More
In case of sale of your personal information, you may opt out by using the link Do Not Sell My Personal Information
Snow-holing has a long and established tradition in Scotland’s winter mountains and in alpine and arctic regions worldwide. Vast amounts of snow still build up in sheltered lee areas on the high, wind-swept Cairngorm Plateau. Many snow-hole sites often hold snow into July, making this a sustainable winter mountaineering activity. However, as Andy Bateman* of Scot Mountain Holidays questions, it’s worth asking whether traditional snow-holing techniques remain appropriate for Scotland’s increasingly mild and variable winter climate. Do we stick with traditional and when it doesn’t work declare snow-holing “dangerous”, or do we prioritize safety and adapt?
Although the Scottish Highlands occasionally make headlines for extreme cold, mountain temperatures never reach true Arctic levels. Recorded lows of below –20°C occur in valley inversions, where cold air pools in glens while summits remain relatively warmer.
For example, Aviemore experiences a wider temperature range than the summit of Cairngorm, whose lowest recorded temperature is only –16.5°C (12 January 1987). By contrast, nearby Nethy Bridge reached an unofficial –31.3°C (10 January 1982)!
At around 1100 m — the typical altitude of many Cairngorm snow-hole sites — winter extremes tend to sit between –8°C and –10°C, with many days around –5°C or warmer. Scotland’s proximity to the North Atlantic Drift keeps conditions comparatively mild, yet still demanding enough to test even experienced snow-holers.
Traditional snow-hole design aims to capture warm air, using raised sleeping platforms, doorways lower than the living area, and cold air drains. Are these features appropriate when winter temperatures in Scotland approach the melting point of the very material providing shelter?
In conditions near 0°C, the focus should be on adequate ventilation to manage internal air temperature and maintain structural stability.
An important point to note is that it takes appreciable heat energy to convert snow at 0 deg C to water at 0 deg C. It means that whilst there may not be a rise in temperature, you may still be “injecting” appreciable heat energy into the snow pack around your snow-hole.
Snow-holing naturally occurs where snow collects deeply — often on steep slopes with the potential for avalanche release. Avalanche risk must therefore be the primary consideration when selecting a site.
If there is any uncertainty about snow-pack stability:
• Avoid slopes steeper than 30 degrees.
• Excavate horizontally from the top of the door at least 1.7 m for slopes of 30 degrees or less before widening the chamber to ensure a minimum 1 m-thick roof.
Scottish snow often becomes extremely hard after repeated cycles of wind, thaw, and refreeze, demanding robust equipment. Ensure you carry:
• A metal-bladed snow shovel – polycarbonate models are largely ineffective in dense, refrozen snow.
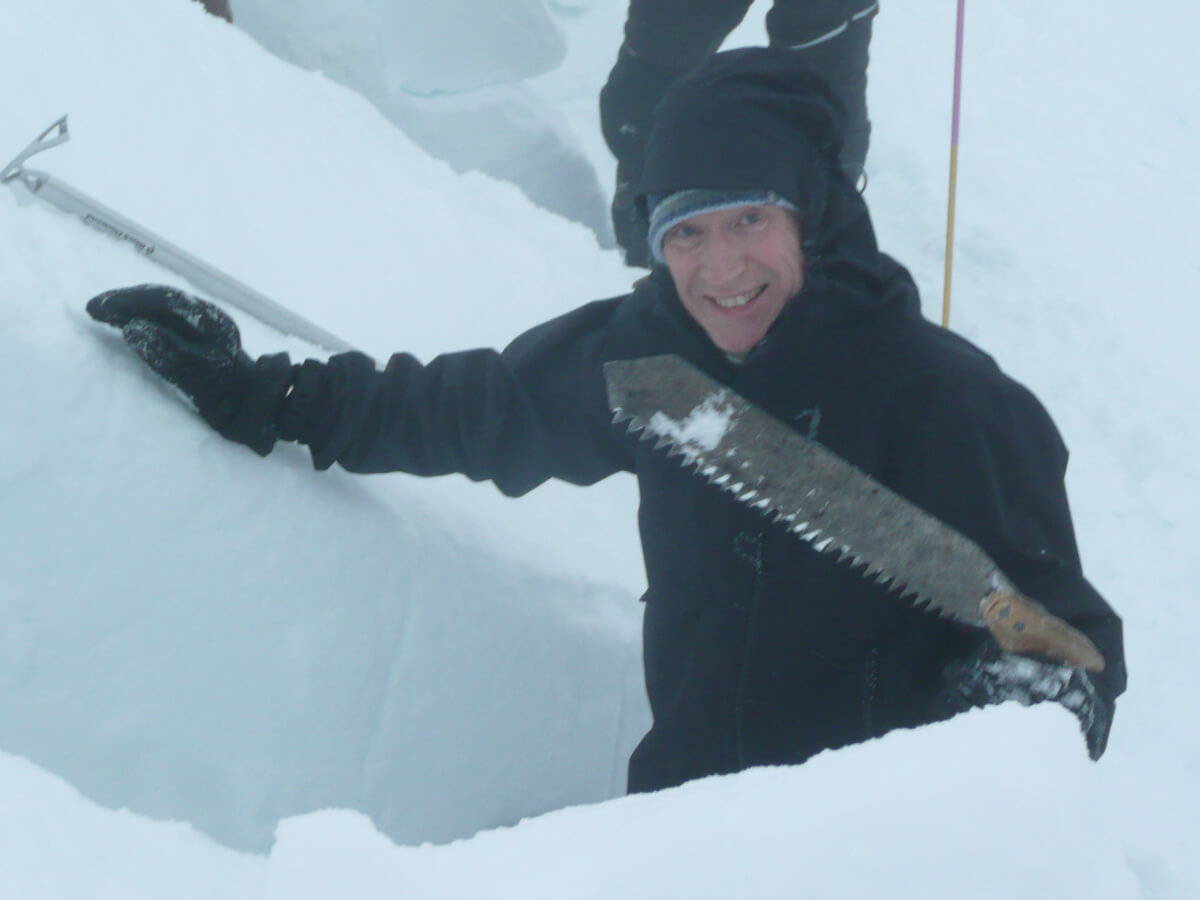
• A snow or “carpentry” saw capable of cutting blocks efficiently when snow is too hard to shovel. A number of dedicated snow saws falter when it comes to Scottish snow.
• A 3-metre avalanche probe to confirm adequate horizontal snow depth before excavation.
• A durable ground sheet or tarp for collecting and dragging excavated snow clear of the entrance.
The correct tools greatly improve both efficiency and safety, especially in hardened Scottish snow conditions.
A snow-hole’s roof design is critical to both safety and durability. In Scottish conditions, attention to vault ceiling and load distribution is essential to minimize unsupported snow.
To achieve a stable structure:
• Keep the floor width to no more than two body widths (about 1.2 m) between the inner front and back walls.
• Excavate upward to form a steeply angled vaulted or apex ceiling, which removes large unsupported sections and promotes strength.
This design offers five major benefits:
1. Eliminates triangular sections of unsupported snow.
2. Prevents flat areas that become drip points.
3. Encourages melt water to drain with the snow pack.
4. Provides limited standing height without unnecessary excavation.
5. Directs warm air toward ventilation holes at the apex.
A properly shaped vaulted ceiling is the key to structural longevity. Reducing unsupported ceiling weight matters more than temperature alone. One snow-hole built by Andy Bateman on 25 March remained intact and safe when re-entered on 19 May after a prolonged thaw, with no roof deformation. Similarly, a BBC Travel Show snow-hole I built endured until late June; though its roof was only 30 cm above the floor, it never collapsed. Nearby structures that had become open hollows.
Roof thickness is equally important. When shaping the vault, avoid thinning the roof excessively — thicker is stronger.
• Minimum roof thickness: at least 1 m of snow overhead.
• Light test: blue light will penetrate up to 1m into the snow. If a pale blue glow is visible through the roof, it’s getting too thin.
• Front-wall strength: ensure the wall is no less than 1 m thick at its narrowest point to bear roof loads safely.
In Scottish snow-holing, roof geometry and thickness are the foundations of safety and endurance.
Effective ventilation is vital for safety in any snow-hole. Inadequate airflow when cooking, can lead to dangerous levels of carbon monoxide (CO) — a colourless, odourless gas produced by incomplete combustion.
All pressure stoves operate by first oxidising fuel to CO and then fully converting it to carbon dioxide (CO₂). Flame colour variations indicate this combustion process. When airflow is restricted, the secondary oxidation step fails, increasing CO production.
Simple ventilation test: exhale — if your breath drifts sideways, airflow is likely sufficient.
Even with good ventilation, a pan of icy water can quench the flame temperature, disrupting combustion and increasing CO output. Research by the British Antarctic Survey (BAS) found that raising pan supports slightly above the burner significantly reduced CO levels during snow melting. Snow-holers should understand the symptoms of CO poisoning, which can include headache, nausea, and dizziness.
While no recorded deaths from CO poisoning have occurred in Scottish snow-holes in recent years, some have reported headaches consistent with exposure. Carrying a small portable CO detector is strongly advised. Always extinguish candles before sleeping — they too emit small amounts of CO.
Key safety guidelines:
• Confirm adequate ventilation before lighting stoves.
• Be aware that even with airflow, cold pans increase CO output by cooling the flame.
• Add snow gradually when melting for water to prevent flame quenching.
• Use a compact CO detector for real-time monitoring.
Overnight snow drift can block entrances and reduce airflow. Studies indicate that with all flames extinguished, hypoxia is not a risk. Poor sleep quality will alert you to low oxygen levels, prompting you to reopen vents instinctively.
Maintaining clear ventilation routes and monitoring air quality are non-negotiable safety practices in winter snow-holing.
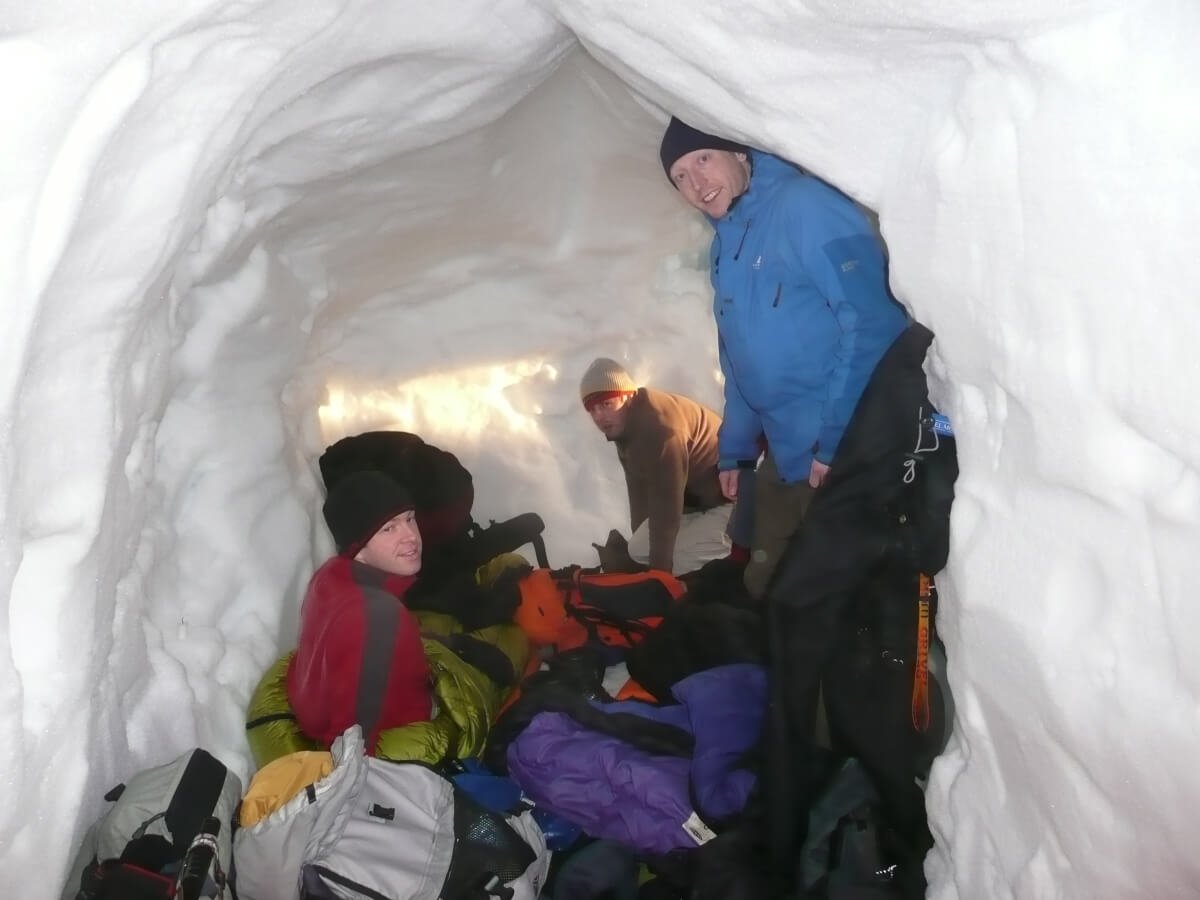
A larger snow-hole is safer. Not only are the ventilation characteristics better and but it also gives you space. One potential hazard of digging a small snow-hole is you don’t have enough room to put the snow after severe drifting. Do not underestimate how quickly the snow can drift into some of these snow-hole sites. 1 m per hour is not unusual. On one occasion I did have to tunnel out 1 ½ m before I hit the surface!
Many Scottish snow-hole sites are located near watercourses, and persistent snow cover slows natural decomposition. Managing human waste responsibly is essential to avoid contamination and maintain site sustainability.
Best practices:
• Use a carry-out system for all human waste.
• Participate in local initiatives such as Cairngorm Mountain’s Snow White Project, which supports sustainable snow-hole waste management.
Following these practices preserves the natural environment and ensures these snow-hole sites remain safe and viable for future mountain users.
All mountain adventure activities carry inherent hazards, and snow-holing in Scotland’s winter mountains is no exception. Instructors and guides must understand these hazards and apply appropriate techniques to reduce risk.
It’s been claimed that Snow-holing is dangerous. Compared with winter climbing (for which there is a whole qualification scheme) it isn’t, and mountain rescue statistics support this. However, attempting to snow-hole in Scotland using methods suited for Arctic conditions at -20°C is likely to cause problems in milder Scottish winters.
Structural integrity is critical. One of the most important factors for safety and longevity is avoiding large areas of unsupported roof or ceiling. A properly vaulted ceiling, sufficient roof thickness and ventilation, and careful internal design prevent collapse even as temperatures rise, whereas improperly supported snow-holes quickly lose their structural integrity. Put simply, if more than two people can sleep side by side, your ceiling is too wide!

* Andy holds the WML and IML awards and has over 20 years Mountain Leading experience. He has guided well over 30 commercial snow-holing trips in this time and although none of the mountaineering qualifications have a remit that covers snow-holing, he is one of the few guides deemed competent by HSE criteria of “relevant experience” to run snow-holing trips.
** British Antartic Survey helped in a BSc thesis. Available on request from andrew@scotmountainholidays.com
Medical references:
www.ncbi.nim.ni.gov/pubmed/18665947
www.ncbi.nim.ni.gov/pubmed/9340627
www.ncbi.nim.ni.gov/pubmed/8355417
www.ncbi.nim.ni.gov/pubmed/15265339
Andy Bateman of Scot Mountain Holidays leads at least 3 commercial snow hole expeditions in the Cairngorms Mountains every winter season. He has introduced scores of people to the magic of the winter season. He is also an expert at the skill of building a snow hole for a drip free night out in the mountains. To see what snowholing expedition experience is like for the customer check out our video on YouTube:
Seasonal temperatures on the high hills in Scotland are never as low as those in the valleys. You need to take this into consideration when planning to snowhole. Here in Boat of Garten we get temperatures of around -20oC. The lowest ever recorded temperature on the summit of Cairngorm is -16.5oC. Cold temperatures in the valley always occur under cold settled conditions. This is when the cold air drains off the mountain. The cold air then pools in the bottom of the valley. This means that in the Cairngorms the temperatures are never as low as in Norway.

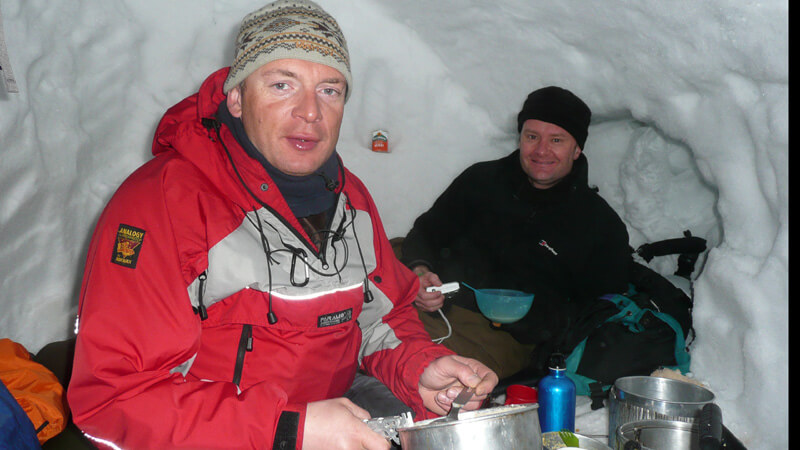
Enjoying an evening meal in the luxury palace makes the snowholing expedition unforgettable!
In Norway, you need to capture the warm air. Most people learn to build snow caves in Norway. They learn to create features which capture the warm air inside the shelter. In Scotland, however, you are operating much close to the melting temperature of snow so sloping entrances, sleeping platforms and cold air drains become much less important for the snow hole expedition.
Roof sag is a combination of the temperature rising too much, poor ventilation and not having a thick enough roof or having a large area of unsupported roof. A roof and front wall of approx. 1m thick is vital. If daylight can be seen through either the roof or the wall, they are probably too thin. However, bear in mind that a roof that thick will need an adequately thick & strong front wall.

Avoid large areas of unsupported roof by keeping your snow hole more like a tunnel, narrow. Aim for a distance of no more than 2 body widths, side by side lengthwise. This means you can create a steep-angled apex ceiling which helps to avoid any drip points and allows you to channel warm air towards ventilation holes.
Many snowhole sites by virtue of their high snow accumulation and steep slopes are prone to avalanches. To be safe, you may need to pick a slope with a more gentle gradient and spend more time digging into the slope. To maintain a 1m thick roof on a 30 degree slope you will have to dig horizontally 2m from the top of the doorway before widening out.

Make sure there is good ventilation and regularly watch your breath then you will avoid carbon monoxide poisoning. If you see it drifting off to one side, it’s a good indication that ventilation is adequate. Never cook in a snowhole without regularly checking there is adequate ventilation.
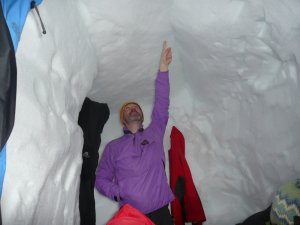
It’s a good idea to create ventilation holes in your snow hole because of the Scottish climatic conditions.
Make your snow hole large enough to stand up in so you don’t get back ache from crouching.
One potential hazard of digging a small snow hole is that you don’t have enough space to put the snow when you attempt to extricate yourself in the morning. One of the snowholes Andy built in the Cairngorms involved digging out through 1.5m of fresh, drifted snow to get out in the morning.

Never underestimate how hard the Scottish snow pack could be. At least make sure your snow shovel has a metal scoop and that you are also carrying a snow saw.
Time taken to construct your snow hole is vital. A communal snow hole can take 4 – 5 hours to dig to make sure that you have the best construction possible.

See more about our snow hole expedition!
(A synopsis in pictures)
The snow’s back here in the Cairngorms and it’s only 4th November 2014 – plenty of time for the snow to build up for a fabulous Christmas and New Year in the Highlands. Take a look at our selection of winter images below – all taken in during winter seasons in the Cairngorms. Will it be an official white Christmas or just white on the high peaks of the Cairngorms

Photo caption: A day out in the snow – heading home in the sunset,
turning the snow pink and giving life to the Cairngorms –
also known as Mhonaidh Ruaidh (the red hills).

Photo caption: Sometimes a wee bit of cloud can play into your hands
and produce a much more stunning picture than a clear blue sky,
especially in the soft winter light we get here in the Cairngorms,
which is of course enhanced by reflection on the snow.

Photo caption: Unique to the Cairngorms National Park,
Britain’s only reindeer herd, which are free-roaming
across the hills in the winter. You could bump into them
on any of our courses or winter walking holidays.

Photo caption: White Christmas? Wouldn’t that be amazing?
This is the kind of snow laden scene
we’d all like to see, but how many of you would like to
experience it yourselves? When the snow lay round about,
deep and crisp and even …

Photo caption: It’s New Year and it’s Scotland – must mean it’s time for a party –
or as you’re in Scotland let’s give it the proper name and join the ceilidh!

Photo caption: Winter walking holiday across the Cairngorm plateau. Check out the blue skies!
Inspired? Check out some of our winter offerings in the Cairngorms and further afield across the Highlands of Scotland
![]() Scot Mountain Holidays (Ltd),
Fraoch Lodge, Deshar Road,
Boat of Garten,
PH24 3BN
Scot Mountain Holidays (Ltd),
Fraoch Lodge, Deshar Road,
Boat of Garten,
PH24 3BN


All content © Copyright Scot Mountain Holidays 2026
Responsive web design by Summit Web Solutions